Raising Invoices
This support article provides a step-by-step guide on how to raise invoices through the Okappy mobile app. This feature streamlines the process of invoicing and collecting payments, ensuring efficient financial transactions directly from your mobile device.
For information on taking payments on the mobile app, see taking payments on your phone.
1. Access the job details
On your mobile device, open the Okappy app.
Navigate to the job you wish to invoice by clicking into it to view the job details.
2. Initiating the Invoice Process
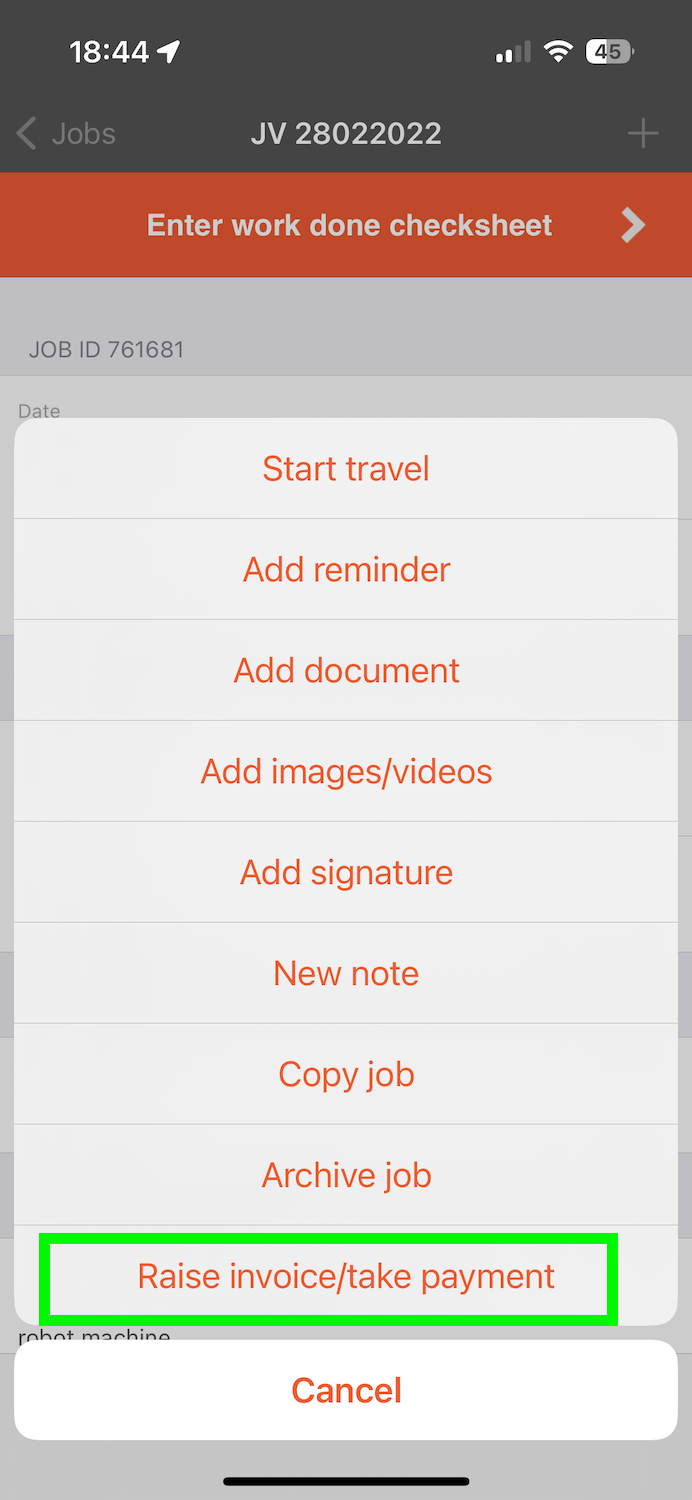
For iOS Users: Click the + icon located towards the top right of the screen.
For Android Users: Click the Okappy icon
From the available options, select Raise invoice/take payment.

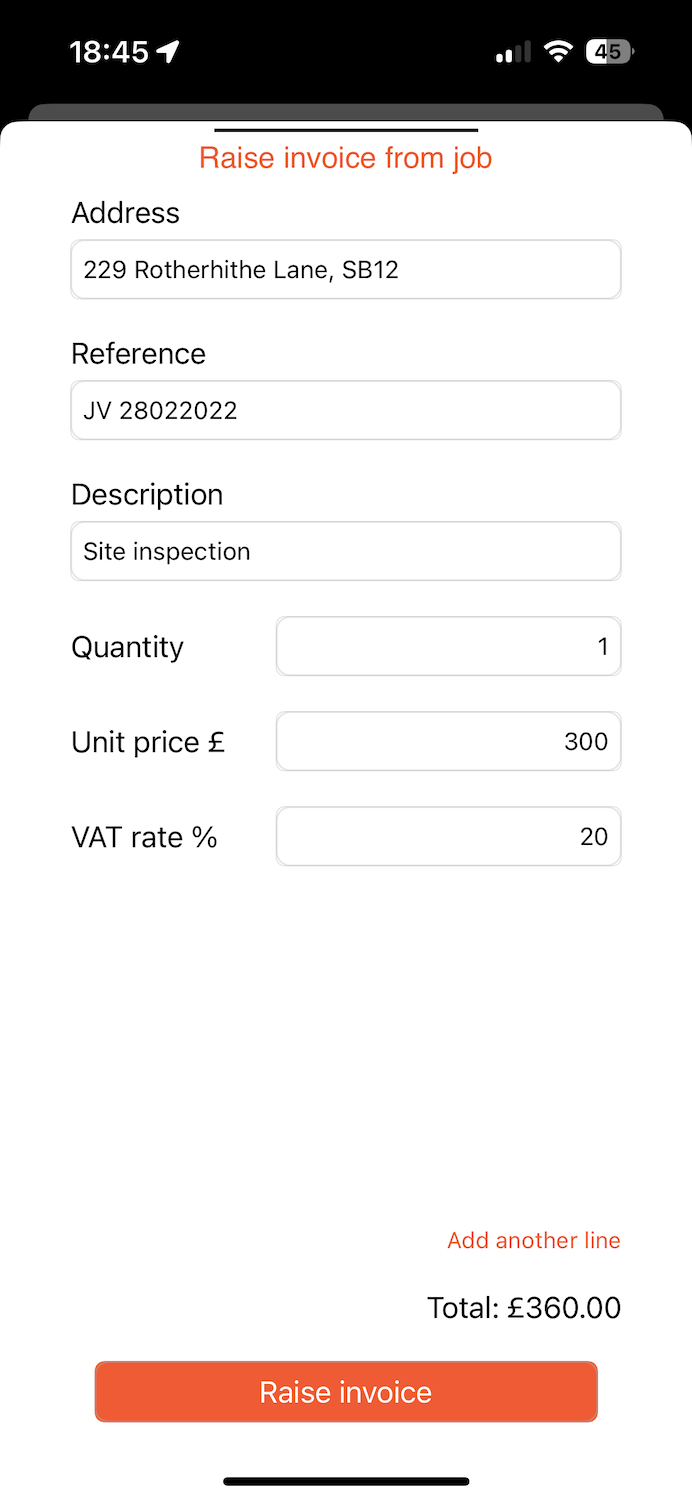
The Raise Invoice screen will be displayed.
Note: Invoices can only be raised for jobs done for a customer, not for yourself.
3. Enter your invoice details
Enter the necessary invoice details including the amount, description, and any other relevant information.

Once completed, click Raise Invoice.
The Pay Invoice screen will appear with the details of the invoice.
For further information on taking payment for an invoice on your mobile, see Taking payments on the mobile app.
Conclusion
Raised invoices through the Okappy mobile app is a convenient and straightforward process. This functionality not only saves time but also ensures that your financial transactions are handled efficiently and securely. Furthermore, you can configure your job template to ensure that a payment has be taken before a job can be completed.
See also
